Difference between revisions of "Zabbix server configuration - core setup"
| Line 34: | Line 34: | ||
[[File:Zabbix user creation p2.png|500px|Zabbix user creation 2]] | [[File:Zabbix user creation p2.png|500px|Zabbix user creation 2]] | ||
| + | |||
| + | |||
| + | |||
| + | |||
| + | =Group management= | ||
| + | |||
| + | ==Host group== | ||
| + | |||
| + | First of all you need to create a new group for your current appliance. | ||
| + | |||
| + | → Configuration menu >> Host groups >> ''Create host group'' | ||
| + | |||
| + | [[File:Zabbix create host group.png|900px|Zabbix create host group]] | ||
| + | |||
| + | |||
| + | |||
| + | >> You can import template as dependency. | ||
| + | |||
| + | [[File:Zabbix create host group 02.png|900px|Zabbix create host group 02]] | ||
| + | |||
| Line 42: | Line 62: | ||
==Configuration== | ==Configuration== | ||
| + | |||
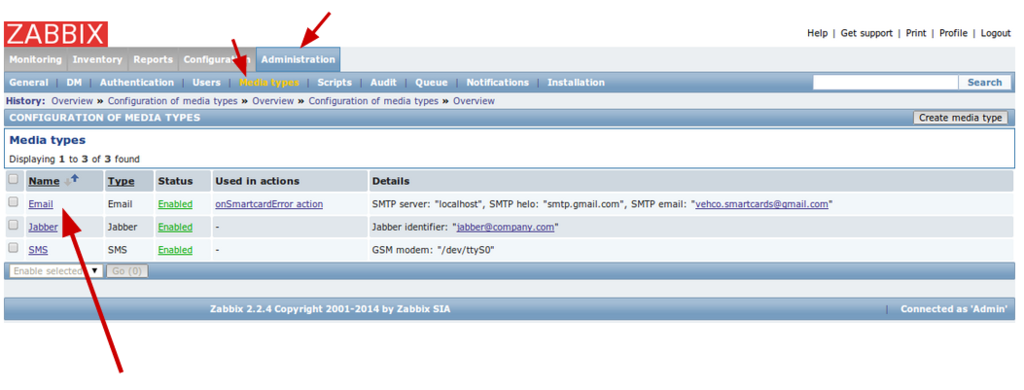
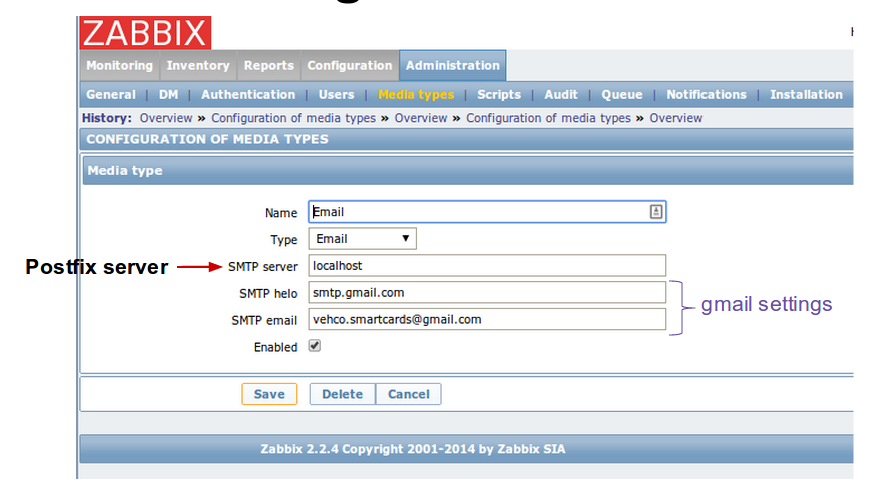
| + | → Administration menu >> Media types >> Email | ||
[[File:Zabbix email.png|1024px|caption|Zabbix email]] | [[File:Zabbix email.png|1024px|caption|Zabbix email]] | ||
| − | |||
| − | |||
Revision as of 16:28, 27 October 2014
This page explains the core settings you need to set before starting using Zabbix.
Contents
Requirements
If you need to send email, you must have access to an email server or setup an email relay.
You can have a look to:
User management
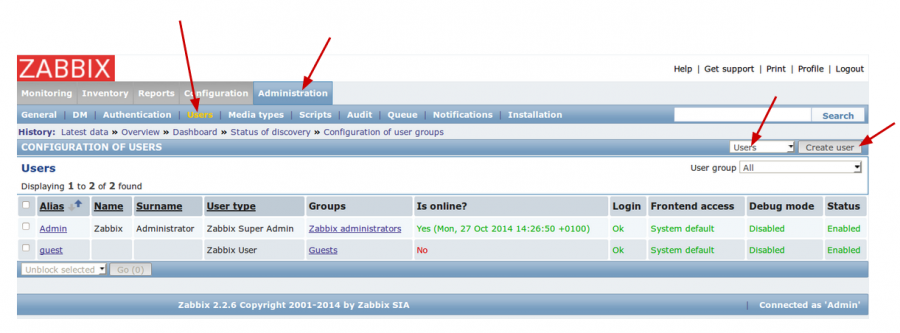
→ Administration menu >> users >> Users
>> Click on Create user
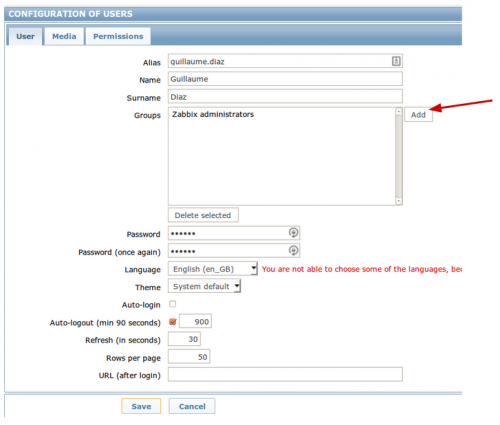
Set the user settings and user group(s):
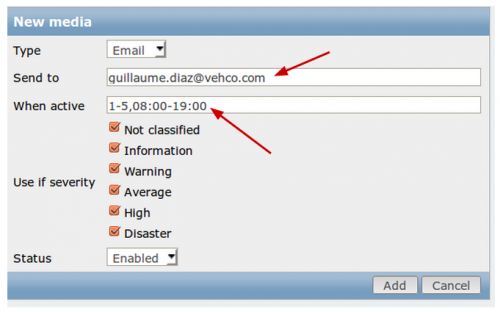
Go to the Media tab to set the user email and time-table:
Group management
Host group
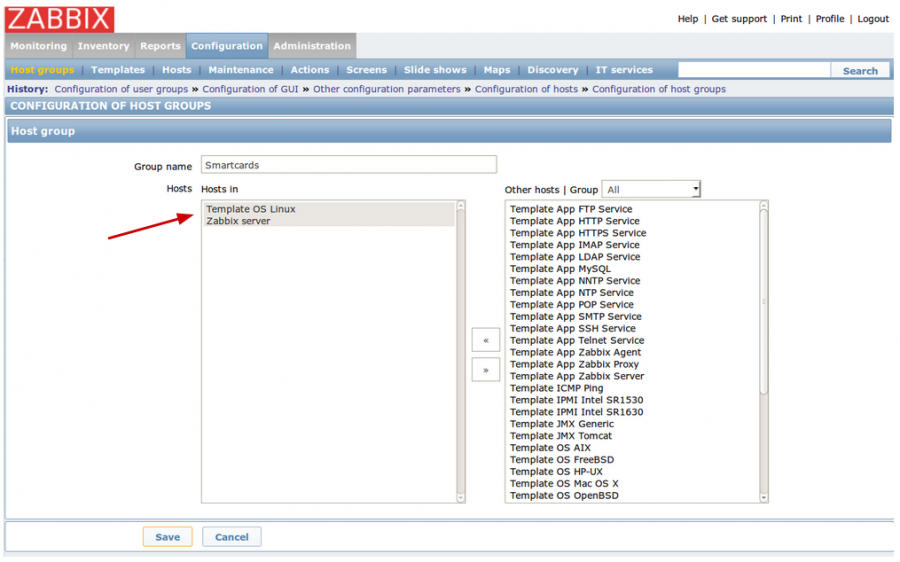
First of all you need to create a new group for your current appliance.
→ Configuration menu >> Host groups >> Create host group
>> You can import template as dependency.
Email configuration
Configuration
→ Administration menu >> Media types >> Email
- Set your SMTP (postfix) server IP / name
- Set your target SMTP server settings [smtp.gmail.com]
- Set your target user name
