Difference between revisions of "Zabbix server hosts management"
| (One intermediate revision by the same user not shown) | |||
| Line 1: | Line 1: | ||
[[Category:Linux]] | [[Category:Linux]] | ||
| + | This explains how to manage hosts. | ||
| − | + | =Hosts overview= | |
| − | |||
| − | |||
| − | |||
| − | |||
| − | |||
| − | |||
| − | |||
| − | |||
| − | |||
| − | |||
| − | |||
| − | |||
| − | |||
| − | |||
| − | |||
| − | |||
| − | |||
| − | |||
| − | |||
| − | |||
| − | |||
| − | |||
| − | |||
| − | |||
| − | |||
| − | |||
| − | |||
| − | |||
| − | |||
| − | |||
| − | |||
| − | |||
| − | |||
| − | |||
| − | |||
| − | |||
| − | |||
| − | |||
| − | |||
| − | |||
| − | |||
| − | |||
| − | |||
| − | |||
| − | |||
| − | |||
| − | |||
| − | |||
| − | |||
| − | |||
| − | |||
| − | |||
| − | |||
| − | |||
| − | |||
| − | |||
| − | |||
| − | |||
| − | |||
| − | |||
| − | |||
| − | |||
| − | |||
| − | |||
| − | |||
| − | |||
| − | |||
| − | |||
| − | |||
| − | |||
| − | |||
| − | |||
| − | |||
| − | |||
[[File:Hosts overview.png|1024px|caption|Hosts overview]] | [[File:Hosts overview.png|1024px|caption|Hosts overview]] | ||
| Line 85: | Line 12: | ||
| − | + | =Add host= | |
You have to had a host (= machine with a zabbix agent) on the server side in order to monitor it. | You have to had a host (= machine with a zabbix agent) on the server side in order to monitor it. | ||
| Line 105: | Line 32: | ||
** You can create your own groups and classification as well | ** You can create your own groups and classification as well | ||
* Agent interface: Fill the info of Zabbix agent running on host | * Agent interface: Fill the info of Zabbix agent running on host | ||
| − | ** Select the ''' | + | ** Select the '''IP''' option instead of DNS. That will avoid some conflicts between FQDN and simple name. |
* Status: Select initial status | * Status: Select initial status | ||
| − | '''IMPORTANT !!''' The name of the ''hostname'' must match the real hostname - as return by the `hostname` command !! | + | '''IMPORTANT !!''' |
| + | |||
| + | The name of the ''hostname'' must match the real hostname - as return by the `hostname` command !! | ||
| + | |||
| Line 134: | Line 64: | ||
5. Click "save" at the bottom of the page. | 5. Click "save" at the bottom of the page. | ||
| − | |||
| − | |||
| − | |||
| − | |||
| − | |||
| − | |||
| − | |||
| − | |||
| − | |||
| − | |||
| − | |||
| − | |||
| − | |||
| − | |||
| − | |||
| − | |||
| − | |||
| − | |||
| − | |||
| − | |||
| − | |||
| − | |||
| − | |||
| − | |||
| − | |||
| − | |||
| − | |||
| − | |||
| − | |||
| − | |||
| − | |||
| − | |||
| − | |||
| − | |||
Latest revision as of 13:36, 28 October 2014
This explains how to manage hosts.
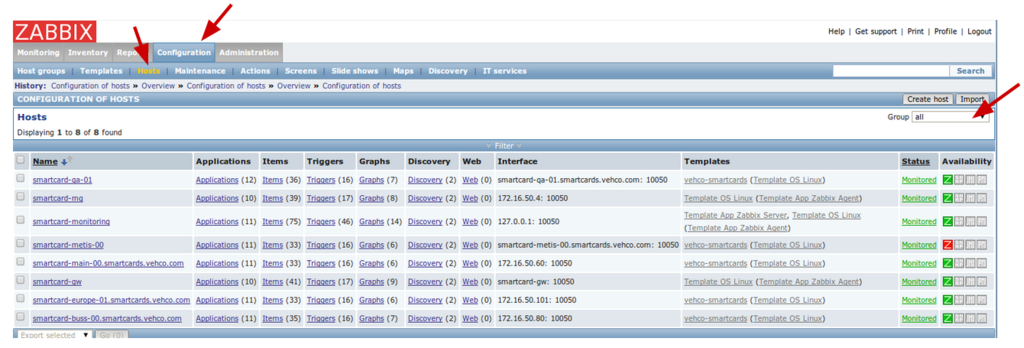
Hosts overview
→ Configuration >> Hosts
Add host
You have to had a host (= machine with a zabbix agent) on the server side in order to monitor it.
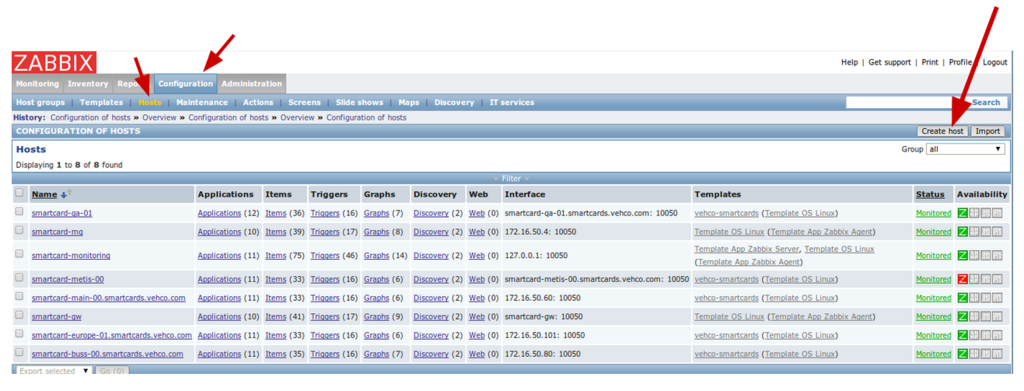
1. Go to the Configuration > Hosts > "Create host"
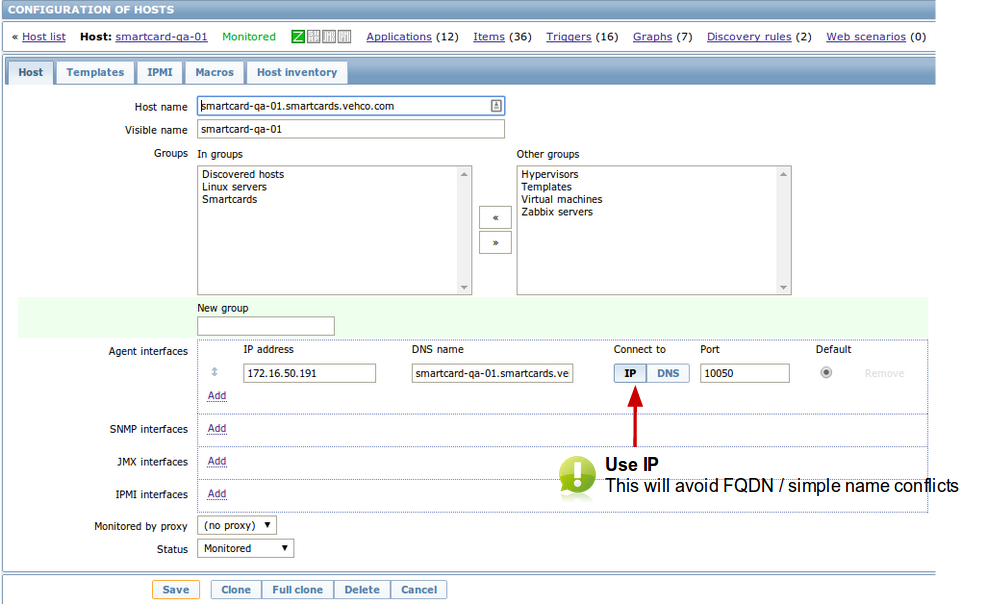
2. Now fill the following details of remote host
- Hostname: Hostname of Remote system
- Visible name: Name to be display in zabbix
- Group: Select the desired group for you host
- You should use Linux at least
- You can create your own groups and classification as well
- Agent interface: Fill the info of Zabbix agent running on host
- Select the IP option instead of DNS. That will avoid some conflicts between FQDN and simple name.
- Status: Select initial status
IMPORTANT !!
The name of the hostname must match the real hostname - as return by the `hostname` command !!
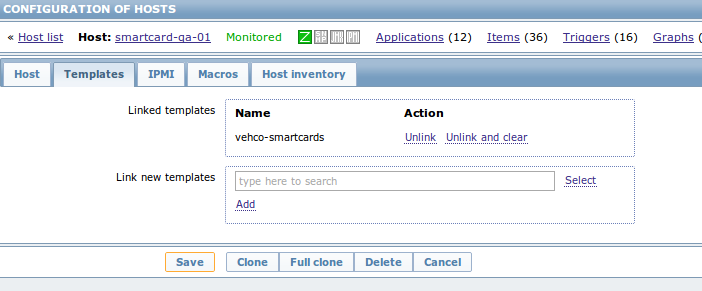
3. Set some monitoring templates to apply
Click on the "Templates" tab
To get the list of templates, just type template in the search area.
Don't forget to click the "ADD" button!
- My custom vehco-smartcards includes the Zabbix agent template
- The Linux OS includes the Zabbix agent template. :)
4. Automatic host inventory
- Click on the "host inventory" tab
- Enable the Automatic option.
5. Click "save" at the bottom of the page.


