Difference between revisions of "Zabbix server hosts management"
| Line 48: | Line 48: | ||
→ Configuration >> Actions >> Discovery | → Configuration >> Actions >> Discovery | ||
| + | |||
| + | |||
| + | Then you can either create a new one or edit an existing one. | ||
| + | |||
| + | * Tab 1 '''Action''' : just put a name and set Enabled | ||
| + | * Tab 2 '''Conditions''' : let the default options | ||
| + | |||
| + | [[File:Zabbix discovery action tab2 conditions.png|none|Zabbix discovery action tab2 conditions]] | ||
| + | |||
| + | * Tab 3 '''Operations''' : set the default template | ||
| + | |||
| + | [[File:Zabbix discovery action tab3 operations.png|none|Zabbix discovery action tab3 operations]] | ||
Revision as of 12:47, 15 August 2014
Contents
Discovery
Discovery rule
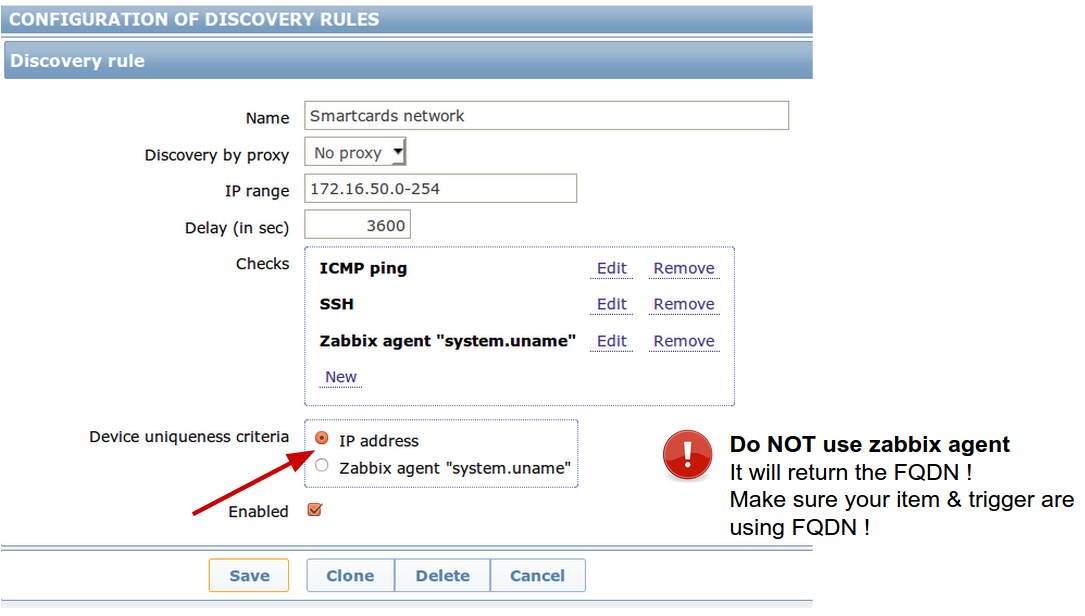
You can create a new Discovery rule using the "create discovery rule" button. Create a Local network rule:
→ Configuration >> Discovery
Then you should have the following settings:
IP range: your network
Checks:
- ICMP ping
- SNMP v2
- SSH
- Zabbix agent
Uniqueness: Zabbix agent
Discovery default group
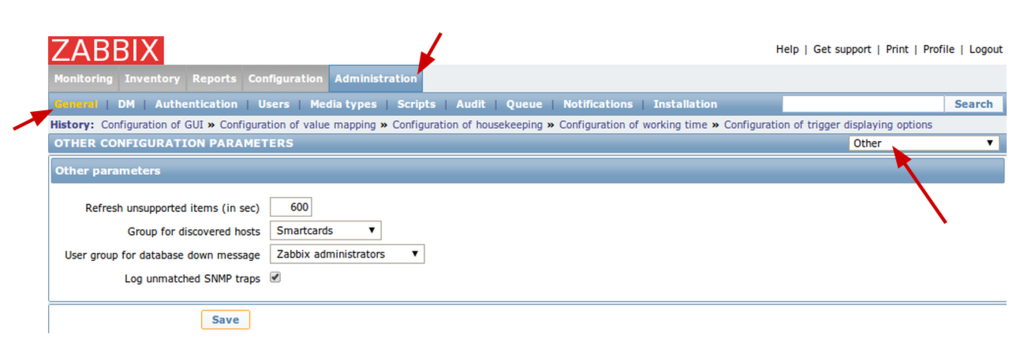
You can set a configuration property for the default group of discovered hosts in:
→ Administration >> General >> Other
Discovery default template
You can set a discovery action to register all Zabbix discovered hosts in a specific template.
→ Configuration >> Actions >> Discovery
Then you can either create a new one or edit an existing one.
- Tab 1 Action : just put a name and set Enabled
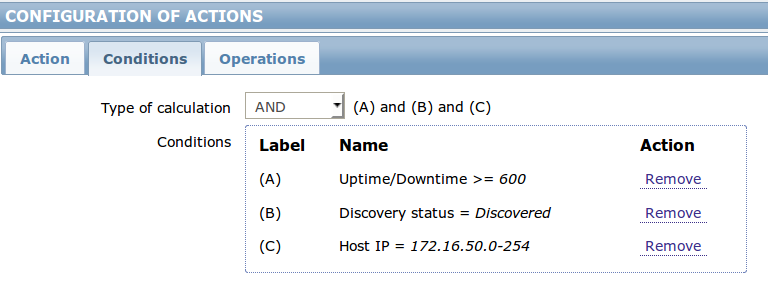
- Tab 2 Conditions : let the default options
- Tab 3 Operations : set the default template
Hosts configuration
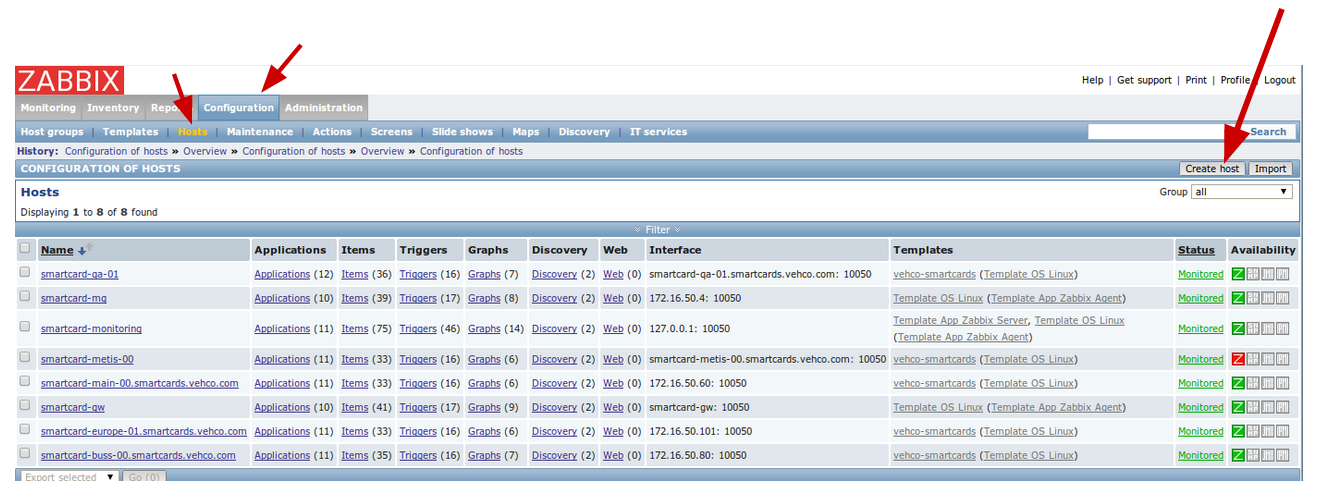
→ Configuration >> Hosts
You should see a list of all available hosts. By default each host use zabbix agent template.
Configuration >> Discovery >> local network
You can set the width | height by clicking "edit".
You should only put the key elements of the network.
Network map
Configuration >> Maps
Monitoring
Hosts status
Management
Hosts management
Configuration >> Hosts >>
Add host
You have to had a host (= machine with a zabbix agent) on the server side in order to monitor it.
1. Go to the Configuration > "Add host" menu
- Click on Configuration Menu
- Click on Hosts submenu
- Click on Create Host button at right side
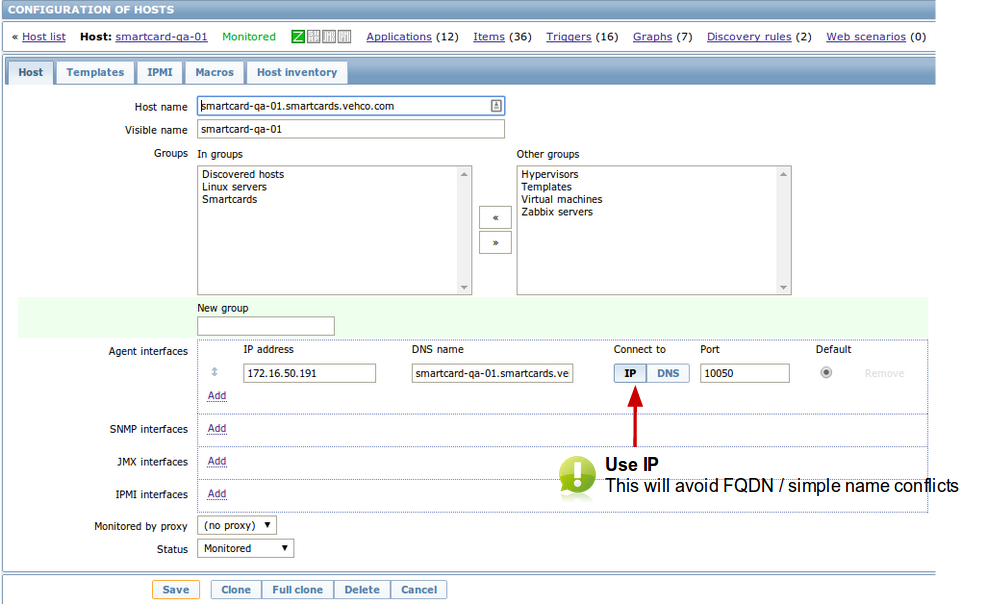
2. Now fill the following details of remote host
- Hostname: Hostname of Remote system
- Visible name: Name to be display in zabbix
- Group: Select the desired group for you host
- You should use Linux at least
- You can create your own groups and classification as well
- Agent interface: Fill the info of Zabbix agent running on host
- Select the DNS option instead of IP. So if we move the client for any reason that will NOT impact the monitoring. :)
- Status: Select initial status
IMPORTANT !! The name of the hostname must match the real hostname - as return by the `hostname` command !!
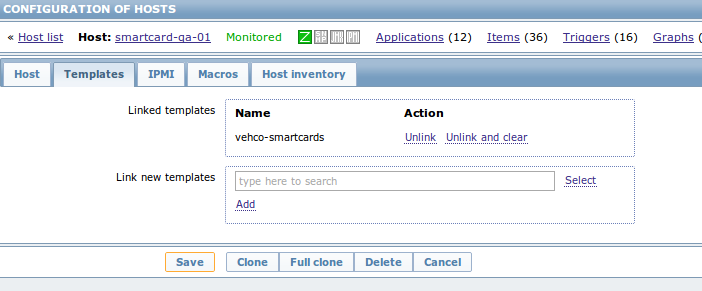
3. Set some monitoring templates to apply
Click on the "Templates" tab
To get the list of templates, just type template in the search area. Select, at least:
- Template OS Linux
- (if your client is NOT a Linux) Template Zabbix agent
Don't forget to click the "ADD" button!
The Linux OS includes the Zabbix agent template. :)
4. Automatic host inventory
Click on the "host inventory" tab
Enable the Automatic option. Click "save" at the bottom of the page.
Setup host discovery
Discovery settings
Go to menu Configuration > Discovery, then click on "Local Network". Fill the form:
- Set the correct LAN settings
- Adjust the time from 3600 to 900 (check every 15 minutes)
- Enable the following Checks:
- ICMP ping
- zabbix agent
- SSH
- SNMP with the following params:
- version: SNMPv2
- port range: 161 (default)
- community: vehco
- SNMP OID: SNMPv2-MIB::sysName.0
- Use a search by IP @ filter
- Enable discovery
Create actions
Go to menu Configuration > Actions
1. Select the actions' group Discovery:
2. Edit the Auto discovery. Linux server action:
- Enable the action
On the "configuration" tab...
Add a "Host IP" filter with your correct LAN as a 4th filter

